JavaFX では CSS を使って UI の外観や振る舞いを装飾することができます。CSS セレクタに hover 擬似クラスを指定することもできるので、 マウスカーソルを重ねたときに外観を変えるのも簡単です。
ですが、 JavaFX は CSS3 の transition プロパティをサポートしていないため、 時間経過で次第にボタンの色を変えていくといったことは (CSS だけでは) 実現できません。
マウスホバー時にゆっくりと色が変わるボタンを JavaFX で作ってみます。
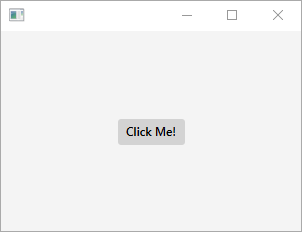
CSSだけを使った場合
JavaFX の CSS hover 擬似クラスだけを使った場合は、 マウスを重ねると一瞬で色が変わってしまいます。

このサンプル ・ プログラムは以下の構成になっています。
- src/main/java
- com/example
- Main.java
- Main.css
- Main.fxml
- com/example
Main.javapackage com.example;

import javafx.application.Application;
import javafx.fxml.FXMLLoader;
import javafx.scene.Parent;
import javafx.scene.Scene;
import javafx.stage.Stage;

public class Main extends Application {
	public static void main(String[] args) {
		launch(args);
	}

	@Override
	public void start(Stage primaryStage) throws Exception {
		FXMLLoader loader = new FXMLLoader(getClass().getResource("Main.fxml"));
		loader.setController(this);
		Parent root = (Parent)loader.load();
		Scene scene = new Scene(root);
		primaryStage.setScene(scene);
		primaryStage.show();
	}
}
Main.fxml<?xml version="1.0" encoding="UTF-8"?>

<?import javafx.scene.*?>
<?import javafx.scene.control.*?>
<?import javafx.scene.layout.*?>

<StackPane xmlns:fx="http://javafx.com/fxml/1"
	stylesheets="@Main.css"
	prefWidth="300"
	prefHeight="200">
	<Button text="Click Me!"/>

</StackPane>
Main.css.button {
	-fx-background-color: lightgrey;
	-fx-font-weight: bold;
	-fx-text-fill: black;
}
.button:hover {
	-fx-text-fill: red;
}
hover 擬似クラスで文字色 (-fx-text-fill プロパティ) に赤 (red) を指定しているだけの単純なプログラムです。このプログラムに、 時間経過でゆっくりと色が変わっていく機能を追加していきます。なお、 背景色を変えるとコードが少し長くなってしまいますので、 まずは文字色のみを変化させていきます。
TransitionとTimelineの違い
JavaFX の javafx.animation.Animation クラスはアニメーションのコア機能を提供しています。サブクラスに javafx.animation.Transition と javafx.animation.Timeline があります。
Transition
一般的なアニメーションを提供するいくつかのサブクラスが Transition クラスから派生しています。フェードイン ・ フェードアウトのアニメーションを提供する FadeTransition クラス、 回転アニメーションを提供する RotateTransition クラスなどです。目的に合致するアニメーションを Transition のサブクラスの中からが見つけられれば、 それを使うのが簡単です。
Timeline
一般的なアニメーションを定義している Transition とは異なり、 Timeline は任意のアニメーションを定義できます。Timeline は任意のプロパティの値を時間経過で変化させていくことができます。たとえばノードの不透明度を表す opacityProperty を 0.0 から 1.0 に変化させれば、 ゆっくりと浮かび上がってくるフェードイン効果になります。
初期値 1.0 の DoublePropery を 200 ミリ秒かけて 8.0 まで変化させる場合のコードは以下のようになります。
DoubleProperty value = new SimpleDoubleProperty(1.0);

new Timeline(
	new KeyFrame(Duration.millis(200),
		new KeyValue(value, 8.0)
	)
).play();
Timeline で指定しているのは 「200 ミリ秒後に」 「値を 8.0 にする」 ということだけです。あとは JavaFX が自動的に中間値を補間してくれます。
DoubleProperyが 1.0 から 8.0 に変化していく様子1.35
2.83
3.39
4.05
4.51
5.07
5.43
5.63
6.19
6.75
7.31
7.87
8.00
Timeline で変化させられるのは DoubleProperty のような数値プロパティだけではありません。ObjectPropety<Color> のような数値以外のプロパティを変化させることもできます。つまり、 Color.BLUE から Color.RED に変化するように指定すれば、 途中の色を JavaFX が補完してなめらかに変化していくアニメーションにしてくれるわけです。
今回は、 Transition クラスではなく Timeline クラスを使って、 文字色のプロパティを変化させていくことでアニメーションを実現してみます。
スキンを作る
「マウスホバーでゆっくりとボタンの色を変える」 機能をどこに実装しましょうか? javafx.scene.control.Button クラスを継承した独自のボタンクラスを作ることもできますが、 外観や振る舞いを少し変えるために独自のボタンクラスを新たに作るというのはあまり良い方法ではありません。
JavaFX にはスキンという仕組みが用意されており、 ボタンなどの UI コントロールに別のスキンを適用することで外観や振る舞いを変えられるようになっています。適用するスキンは、 CSS の -fx-skin プロパティで指定できるので、 既存の Java コードを変更せずに、 CSS の変更のみで外観を変えることできます。
- javafx.scene.control.Skin インターフェースを実装した独自のスキンを作る
- 標準のボタン (javafx.scene.control.Button) に作成したスキンを適用する
この 2 つの手順で進めていきます。
TransitionButtonSkin
作成するスキンのクラス名は TransitionButtonSkin としました。ソースコード全体は以下の通りです。
TransitionButtonSkin.javapackage com.example;

import javafx.animation.KeyFrame;
import javafx.animation.KeyValue;
import javafx.animation.Timeline;
import javafx.beans.property.ObjectProperty;
import javafx.beans.property.SimpleObjectProperty;
import javafx.scene.control.Button;
import javafx.scene.control.skin.ButtonSkin;
import javafx.scene.paint.Color;
import javafx.scene.paint.Paint;
import javafx.util.Duration;

public class TransitionButtonSkin extends ButtonSkin {

	private Duration duration = Duration.millis(1000);
	private ObjectProperty<Color> textColorProperty
		= new SimpleObjectProperty<Color>(Color.TRANSPARENT);

	private Color textEndColor = getTextColor();
	public TransitionButtonSkin(Button control) {
		super(control);
		registerChangeListener(control.focusedProperty(), o -> updateTextColor());
		registerChangeListener(control.hoverProperty(),   o -> updateTextColor());
		registerChangeListener(control.pressedProperty(), o -> updateTextColor());
	}
	protected Color getTextColor() {
		Paint paint = getSkinnable().getTextFill();
		if(paint instanceof Color) {
			return (Color)paint;
		}
		return Color.TRANSPARENT;
	}
	protected void updateTextColor() {
		Button control = getSkinnable();
		control.textFillProperty().unbind();
		control.applyCss();
		textColorProperty.setValue(textEndColor);
		textEndColor = getTextColor();
		control.textFillProperty().bind(textColorProperty);
		new Timeline(
			new KeyFrame(duration,
				new KeyValue(textColorProperty, textEndColor)
			)
		).play();
	}
}
ButtonSkin クラスを継承して TransitionButtonSkin を作ります。(ButtonSkin クラスは Skin インターフェースを実装しています。)
スキンは、 適用対象となるコントロールを引数として受け取るコンストラクタを実装する必要があります。このコンストラクタは JavaFX によって自動的に呼び出されます。
適用対象のコントロールを受け取るコンストラクタpublic TransitionButtonSkin(Button control)
コントロールに適用されているスタイルを参照することはできない?
目的となるスキンを実装するためには、 ホバーしたときに何色に変えるべきなのかを知る必要があります。
CSS.button {
	-fx-text-fill: black;
}
.button:hover {
	-fx-text-fill: red;
}
このような CSS が適用されているとき、 マウスをホバーすると文字色が何色になるのかを知りたいわけです。
JavaFX のコントロール (javafx.scene.control.Control) には getCssMetaData メソッドがあるのですが、 このメソッドでは状態 (擬似クラス) ごとに適用される値を参照することはできないようです。残念です。
getTextFill メソッドは現在の状態を反映した文字色を返してくれます。マウスをホバーしていない状態でこのメソッドを呼び出しても、 ホバーしたときの色を知ることはできません。ホバーしている状態でこのメソッドを呼び出せば、 ホバー状態の色 (red) を返してくれます。
つまり、 ホバー状態に変わったときに getTextFill メソッドを呼び出せば、 ホバー状態で使うべき文字色を知ることができるということです。
ホバー状態 (hoverProperty) の変化を監視するリスナーを登録しましょう。
registerChangeListener(control.hoverProperty(), o -> updateTextColor());
これで、 ホバー状態が変化するたびに updateTextColor メソッドが呼び出されます。
applyCssメソッドが必要な理由
updateTextColor メソッドが呼ばれたときに getTextFill メソッドを呼び出しても何故か直前の文字色が返されてしまいます。(ホバー状態になったときにホバー直前の文字色が返され、 ホバー解除時にホバー状態の文字色が返されます。)
どうやら、 hoverProperty が変化した瞬間はまだ文字色が更新されておらず、 次のサイクル (JavaFX パルスイベント) にならないと文字色が更新されないようです。Platform.runLater で少し遅らせて (次のパルスに進ませて) から処理することも考えたのですが、 スマートではありません。
何か良い方法はないものかと探してみたところ、 applyCss メソッドを明示的に呼び出すと (次のパルスを待たずに) 現在の状態に応じたスタイルが適用され、 正しく文字色を参照できることが分かりました。
hoverPropery の変化を監視するリスナー内で、 最新の状態を参照するためには applyCss メソッドを呼び出す必要があるわけですね。
最新の文字色が参照できないprotected void updateTextColor() {
	Button control = getSkinnable();

	Paint paint = control.getTextFill(); // NG
}
applyCssメソッドを呼び出すと最新の文字色が参照できるprotected void updateTextColor() {
	Button control = getSkinnable();

	control.applyCss();
	Paint paint = control.getTextFill(); // OK
}
unbindメソッドが必要な理由
textFillProperty に値をバインドしていると getTextFill メソッドはバインドしている値を返します。当たり前ですね。
バインドしてると getTextFill メソッドを呼び出しても CSS で適用される値を参照することはできなくなります。CSS で適用される値を参照するためには、 一時的にバインディングを解除する必要があります。
バインド中はCSS指定の文字色が参照できないprotected void updateTextColor() {
	Button control = getSkinnable();
	Paint paint = control.getTextFill(); // NG
}
バインドを解除すればCSS指定の文字色が参照できるprotected void updateTextColor() {
	Button control = getSkinnable();
	control.textFillProperty().unbind();
	Paint paint = control.getTextFill(); // OK
}
仕上げ
ホバー状態が変化したときに CSS の文字色設定を正しく参照するためには applyCss と unbind が不可欠であるということが分かりました。
適切な文字色を参照した後は、 再び textColorProperty をバインドします。そして、 Timeline で textColorProperty の値を変化させていくと、 文字色がゆっくりと変化していきます。
control.textFillProperty().bind(textColorProperty);
new Timeline(
	new KeyFrame(duration,
		new KeyValue(textColorProperty, textEndColor)
	)
).play();
サンプルプログラムでは変化が分かりやすいように、 1,000 ミリ秒のとてもスローなアニメーションになっています。実際は、 50~100 ミリ秒ほどのさりげないアニメーションにするのが良いと思います。
private Duration duration = Duration.millis(1000);
独自のスキンを適用する
ひとまず、 文字色を変化させる独自のスキン TransitionButtonSkin ができました。
このスキンをボタンに適用してみましょう。
適用方法は簡単です。CSS の -fx-skin プロパティで、 スキンのパッケージ名を含む完全修飾クラス名を指定するだけです。
-fx-skin: "com.example.TransitionButtonSkin";
スキンの指定を追加した Main.css は以下のようになります。
Main.css.button {
	-fx-skin: "com.example.TransitionButtonSkin";
	-fx-background-color: lightgrey;
	-fx-font-weight: bold;
	-fx-text-fill: black;
}
.button:hover {
	-fx-text-fill: red;
}
- CSSではなくJavaプログラムコードでスキンを指定する方法
- Button btn = ・・・;
btn.setSkin(new TransitionButtonSkin(btn));
TransitionButtonSkin が追加されたサンプルプログラムの構成です。
- src/main/java
- com/example
- Main.java
- Main.css
- Main.fxml
- TransitionButtonSkin.java
- com/example
プログラムを実行して、 マウスにカーソルを重ねるとゆっくりと文字が赤色に変わっていきます。カーソルを離すと文字が黒色に戻っていきます。
背景色も変わるスキン完成版
文字色だけでなく背景色も変わるバージョンの TransitionButtonSkin.java を以下に示します。
TransitionButtonSkin.javapackage com.example; import java.util.List; import javafx.animation.KeyFrame; import javafx.animation.KeyValue; import javafx.animation.Timeline; import javafx.beans.binding.ObjectBinding; import javafx.beans.property.DoubleProperty; import javafx.beans.property.ObjectProperty; import javafx.beans.property.SimpleDoubleProperty; import javafx.beans.property.SimpleObjectProperty; import javafx.geometry.Insets; import javafx.scene.control.Button; import javafx.scene.control.skin.ButtonSkin; import javafx.scene.layout.Background; import javafx.scene.layout.BackgroundFill; import javafx.scene.layout.CornerRadii; import javafx.scene.paint.Color; import javafx.scene.paint.Paint; import javafx.util.Duration; public class TransitionButtonSkin extends ButtonSkin { private Duration duration = Duration.millis(1000); private ObjectPropertytextColorProperty = new SimpleObjectProperty (Color.TRANSPARENT); private ObjectProperty backgroundColorProperty = new SimpleObjectProperty (Color.TRANSPARENT); private DoubleProperty opacityProperty = new SimpleDoubleProperty(0.0); private OpaqueBackgroundBinding backgroundBinding = new OpaqueBackgroundBinding(backgroundColorProperty, opacityProperty); private Color textEndColor = getTextColor(); private Color backgroundEndColor = (Color)getBackgroundFill().getFill(); public TransitionButtonSkin(Button control) { super(control); registerChangeListener(control.focusedProperty(), o -> updateBackground()); registerChangeListener(control.hoverProperty(), o -> updateBackground()); registerChangeListener(control.pressedProperty(), o -> updateBackground()); } protected Color getTextColor() { Paint paint = getSkinnable().getTextFill(); if(paint instanceof Color) { return (Color)paint; } return Color.TRANSPARENT; } protected BackgroundFill getBackgroundFill() { Background background = getSkinnable().getBackground(); if(background != null) { List fills = background.getFills(); if(fills.size() > 0) { Paint paint = fills.get(0).getFill(); if(paint instanceof Color) { return fills.get(0); } } } return new BackgroundFill(null, null, null); } protected void updateBackground() { Button control = getSkinnable(); control.textFillProperty().unbind(); control.backgroundProperty().unbind(); control.applyCss(); textColorProperty.setValue(textEndColor); backgroundColorProperty.setValue(backgroundEndColor); opacityProperty.setValue(backgroundEndColor.getOpacity() == 0.0 ? 0.0 : 1.0); textEndColor = getTextColor(); control.textFillProperty().bind(textColorProperty); BackgroundFill fill = getBackgroundFill(); backgroundEndColor = (Color)fill.getFill(); backgroundBinding.radii = fill.getRadii(); backgroundBinding.insets = fill.getInsets(); control.backgroundProperty().bind(backgroundBinding); if(backgroundColorProperty.getValue().getOpacity() > 0.0 && backgroundEndColor.getOpacity() > 0.0) { new Timeline( new KeyFrame(duration, new KeyValue(textColorProperty, textEndColor), new KeyValue(backgroundColorProperty, backgroundEndColor) ) ).play(); } else if(backgroundColorProperty.getValue().getOpacity() > 0.0) { new Timeline( new KeyFrame(duration, new KeyValue(textColorProperty, textEndColor), new KeyValue(opacityProperty, 0.0) ) ).play(); } else if(backgroundEndColor.getOpacity() > 0.0) { new Timeline( new KeyFrame(Duration.ONE, new KeyValue(backgroundColorProperty, backgroundEndColor) ), new KeyFrame(duration, new KeyValue(textColorProperty, textEndColor), new KeyValue(opacityProperty, 1.0) ) ).play(); } else { new Timeline( new KeyFrame(duration, new KeyValue(textColorProperty, textEndColor) ) ).play(); } } private class OpaqueBackgroundBinding extends ObjectBinding { private ObjectProperty colorProperty; private DoubleProperty opacityProperty; private CornerRadii radii; private Insets insets; public OpaqueBackgroundBinding(ObjectProperty colorProperty, DoubleProperty opacityProperty) { this.colorProperty = colorProperty; this.opacityProperty = opacityProperty; bind(colorProperty, opacityProperty); } @Override protected Background computeValue() { Color c = colorProperty.getValue(); Color color = new Color( c.getRed(), c.getGreen(), c.getBlue(), c.getOpacity() * opacityProperty.getValue()); return new Background(new BackgroundFill(color, radii, insets)); } } }
背景 (Background) は色だけでなくコーナーの丸み (CornerRadii) と余白 (Insets) を持っているので、 文字色を変えるときよりも処理が複雑になっています。ですが、 基本的な考え方は文字色のときと同じです。
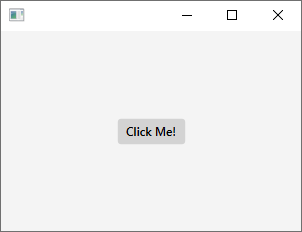
サンプル・プログラム
完成したサンプル ・ プログラムのソースコードは下記のリンクからダウンロードできます。
サンプル ・ プログラムを実行している様子です。
マウスホバーで色を変えるカスタム ・ スキンの作成は以上です。